Integrations
VibeFlow integrates with external services to sync your project data where your team already works.
Atlassian Integration
Connect your Atlassian Cloud account to sync VibeFlow content to Confluence and import work from Jira.
Connecting
- Navigate to the Integrations tab in the top-level sidebar
- Click Connect Atlassian Account
- You'll be redirected to Atlassian to authorize the axiomstudio app
- Grant the requested permissions (Confluence + Jira scopes)
- You're redirected back to VibeFlow — connected!
Each team member connects their own Atlassian account. This preserves identity: when you create a document in VibeFlow, the corresponding Confluence page is authored by you in Confluence.
If you previously connected for Confluence only, reconnecting will prompt you to grant additional Jira scopes.
Confluence Sync
When Confluence is enabled, VibeFlow automatically syncs your documents and contexts to a "VibeFlow" Confluence space:
What syncs:
- Design documents (PRDs, architecture, style guides)
- Project and feature contexts
How it's organized:
VibeFlow (Confluence space)
└── {project-name}/
    ├── context/
    │   ├── project-context.md
    │   └── feature-contexts...
    └── documents/
        ├── PRDs/
        ├── Architecture/
        └── General/
Transparent sync — No extra steps. Edit a document in VibeFlow and it automatically syncs to Confluence. A sync status badge on each document shows the current state (synced, syncing, failed).
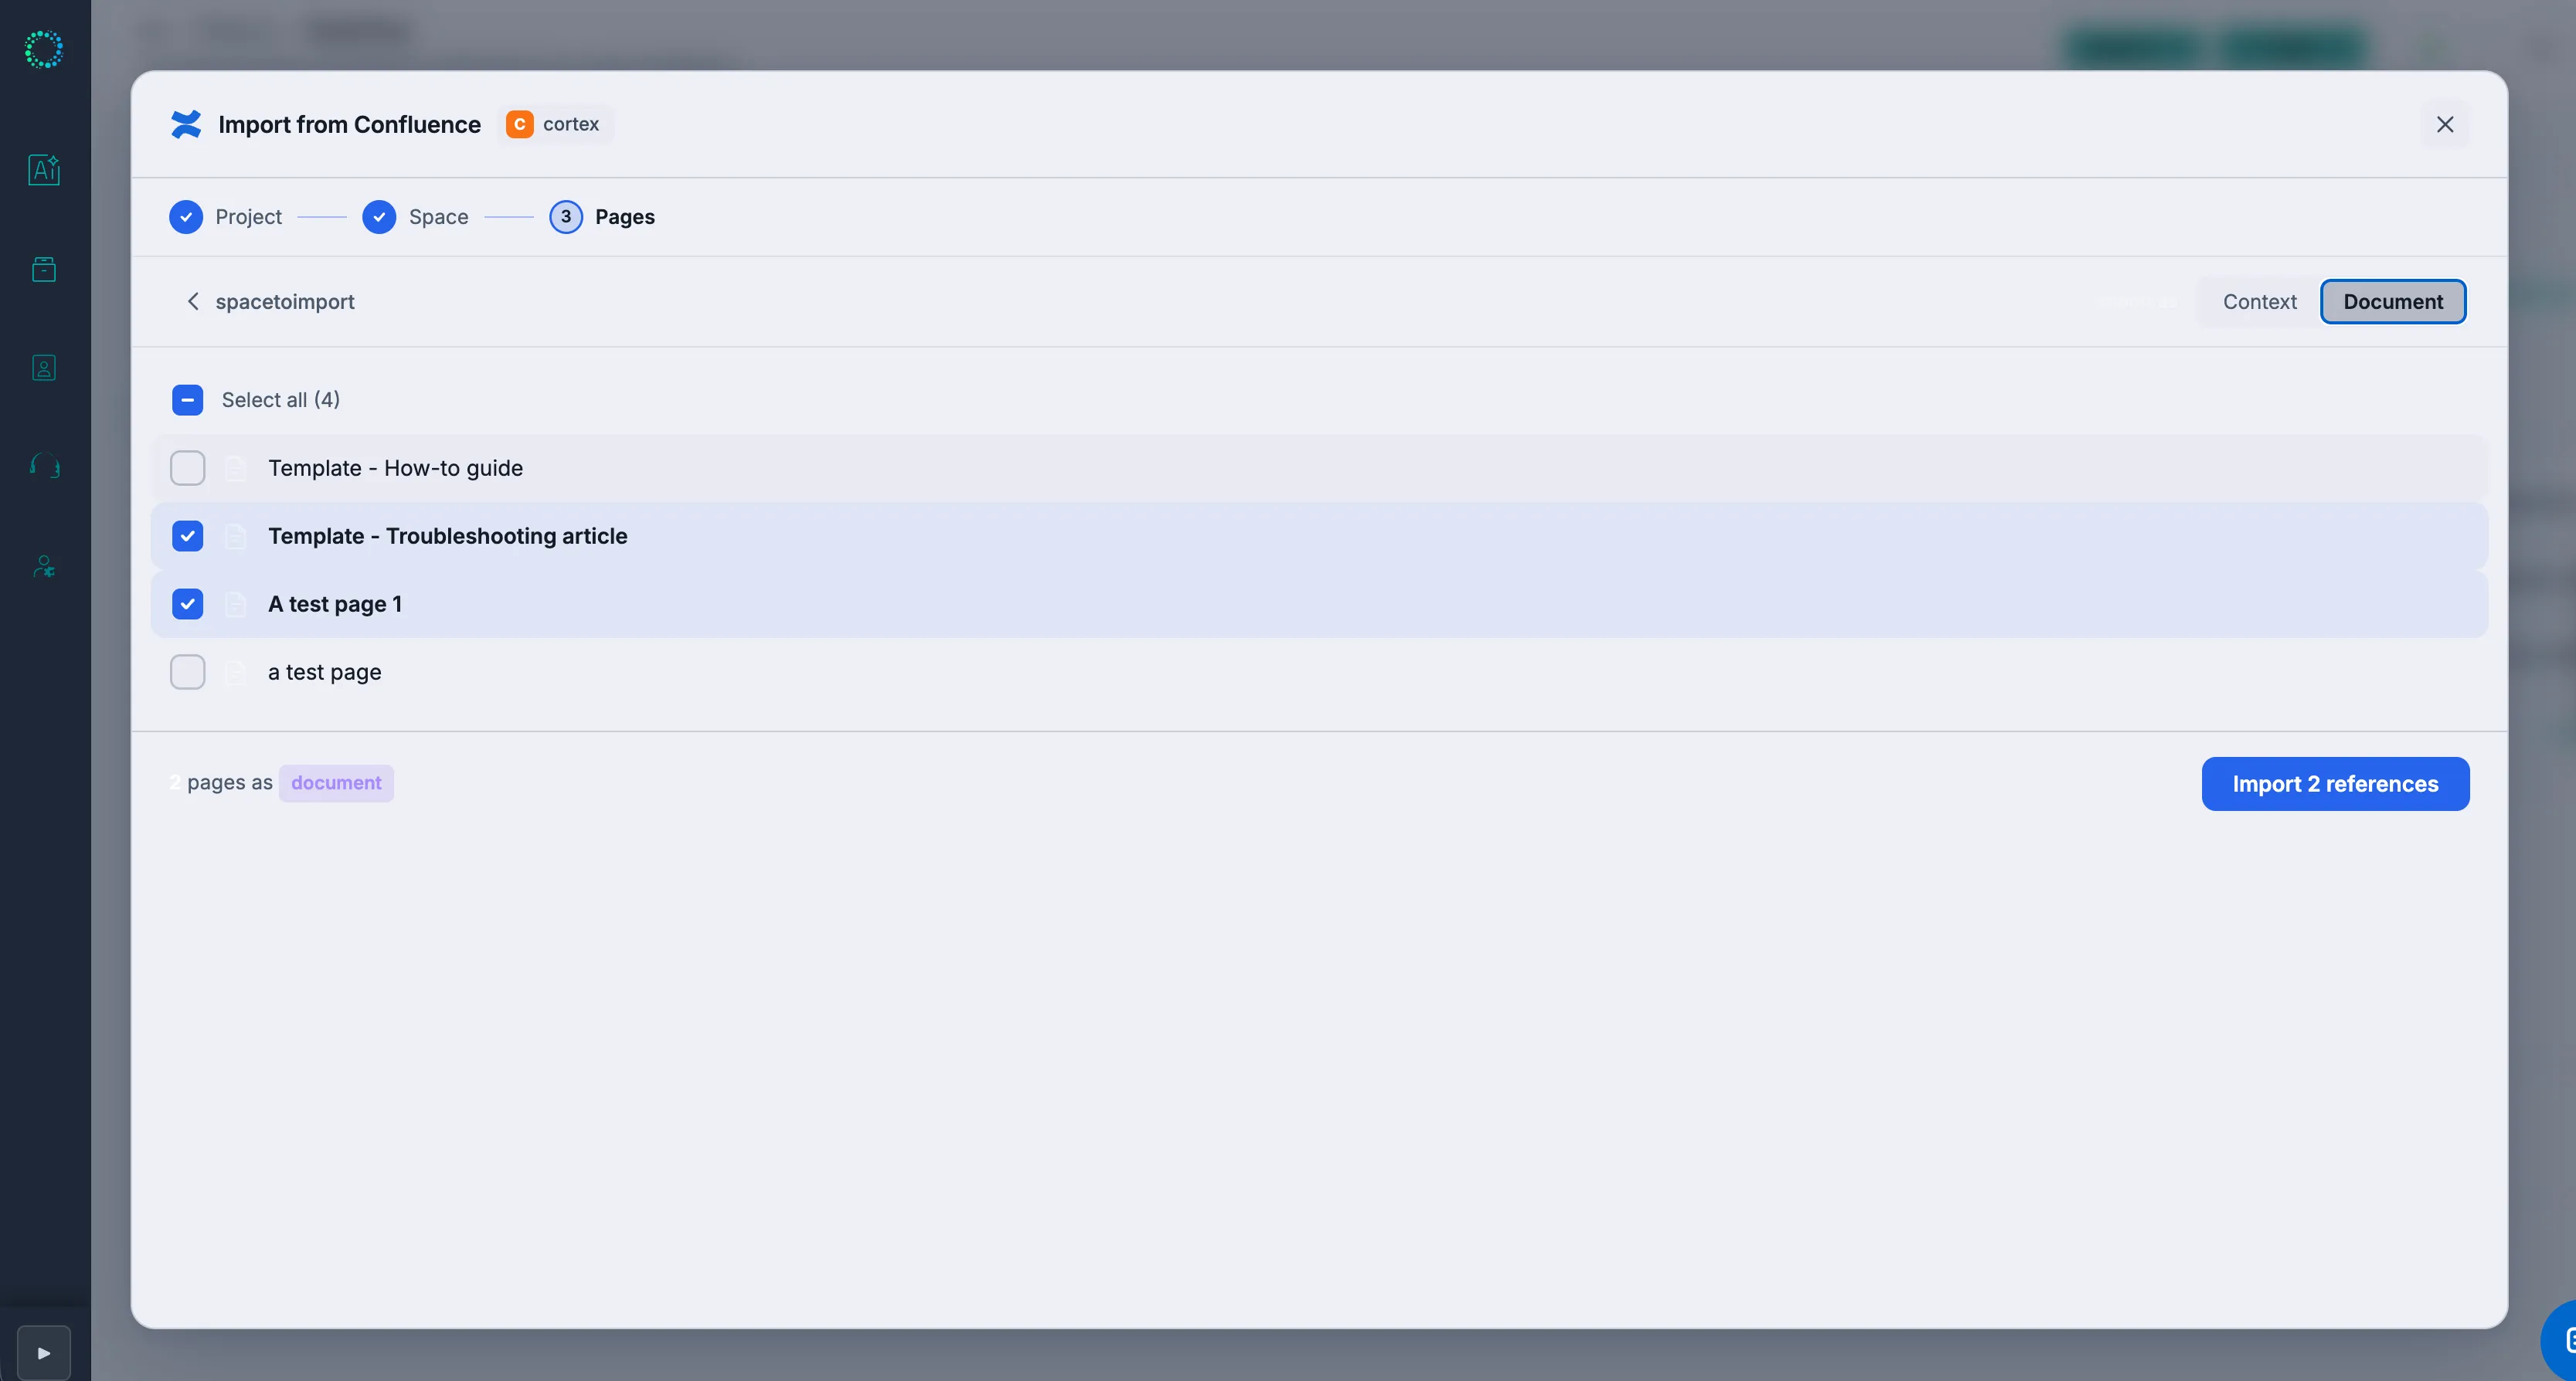
Import from Confluence — Import existing Confluence pages into VibeFlow as documents or contexts. Three import modes:
- Single page — Import one page by URL or search
- Page tree — Import a parent page and all its children, preserving hierarchy
- Space mapping — Browse a Confluence space and select pages to import
Confluence References — Link Confluence pages as read-only references attached to projects or features. Agents can read reference content during implementation but cannot modify the source page. References are cached with a 15-minute TTL and refreshed automatically.
Jira Integration
VibeFlow's Jira integration follows a Jira-primary model: Jira is the source of truth for ticket management, and VibeFlow is the AI accelerator that implements the work.
How it works:
- Import Jira tickets into VibeFlow
- AI agents implement the work
- Status, PR links, and commit details flow back to Jira automatically
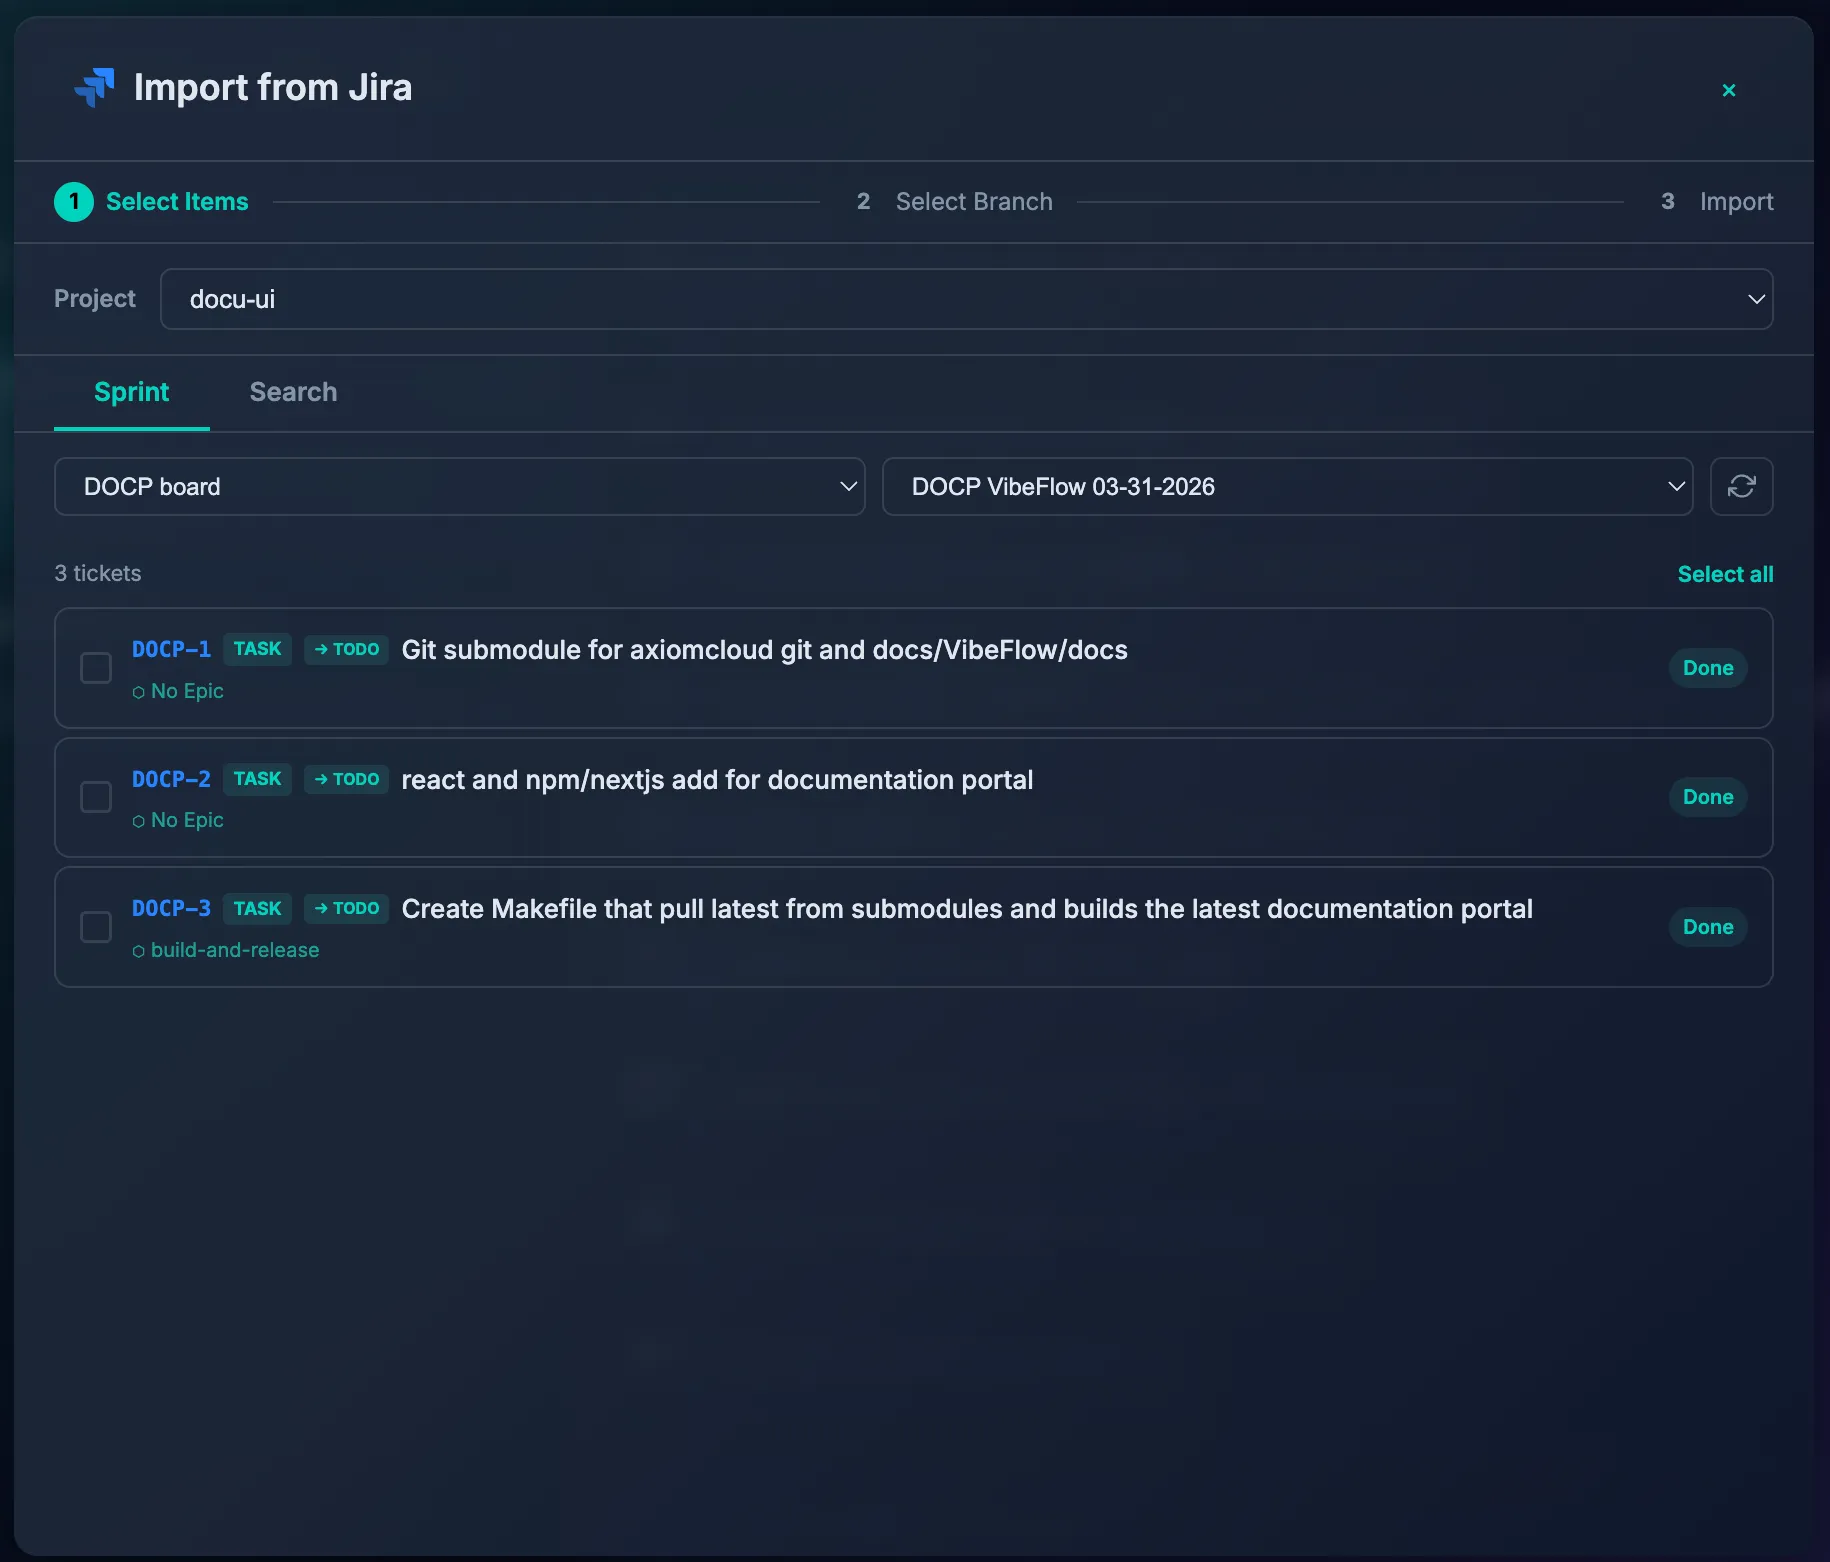
Import Wizard
The Jira Import Wizard is a 3-step process:
-
Select Items — Browse by sprint or search by keyword/JQL
- Sprint tab: Select a board and sprint, then pick tickets
- Search tab: Search by ticket key (PROJ-123) or keyword; JQL queries supported
- Already-imported tickets are greyed out
- Tickets are grouped by Epic with auto-type detection (Bug → Issue, Task/Story → Todo)
-
Select Branch — Choose which git branch the imported items should target
- Agents on that branch will pick up the work
- Defaults to the project's default branch
- Shows branches with active agent sessions
-
Import — Review progress as tickets are imported
- Epic → Feature auto-mapping (existing features matched by name, or new ones created)
- Jira attachments downloaded and uploaded as VibeFlow assets (25MB limit)
Jira Status Sync
Status changes in VibeFlow automatically sync to Jira:
| VibeFlow Event | Jira Action |
|---|---|
Agent starts implementing | Transition to "In Progress" |
Item marked done | Transition to "Done"/"Closed"/"Resolved" |
| Execution log published | Comment posted to Jira ticket |
| Description updated | Jira description updated (Markdown to ADF) |
Sync is asynchronous via a Redis queue. Each job independently resolves a valid Atlassian token using a fallback chain (acting user → project creator → any org user with Jira enabled).
Jira Sync Badge
Imported items display a clickable badge showing the Jira key (e.g., PROJ-123) with sync status:
- Linked (teal) — Imported, sync active
- Syncing (yellow) — Status transition in progress
- Completed (green) — Done transition and comment posted
- Failed (red) — Sync error; hover for details, click to retry
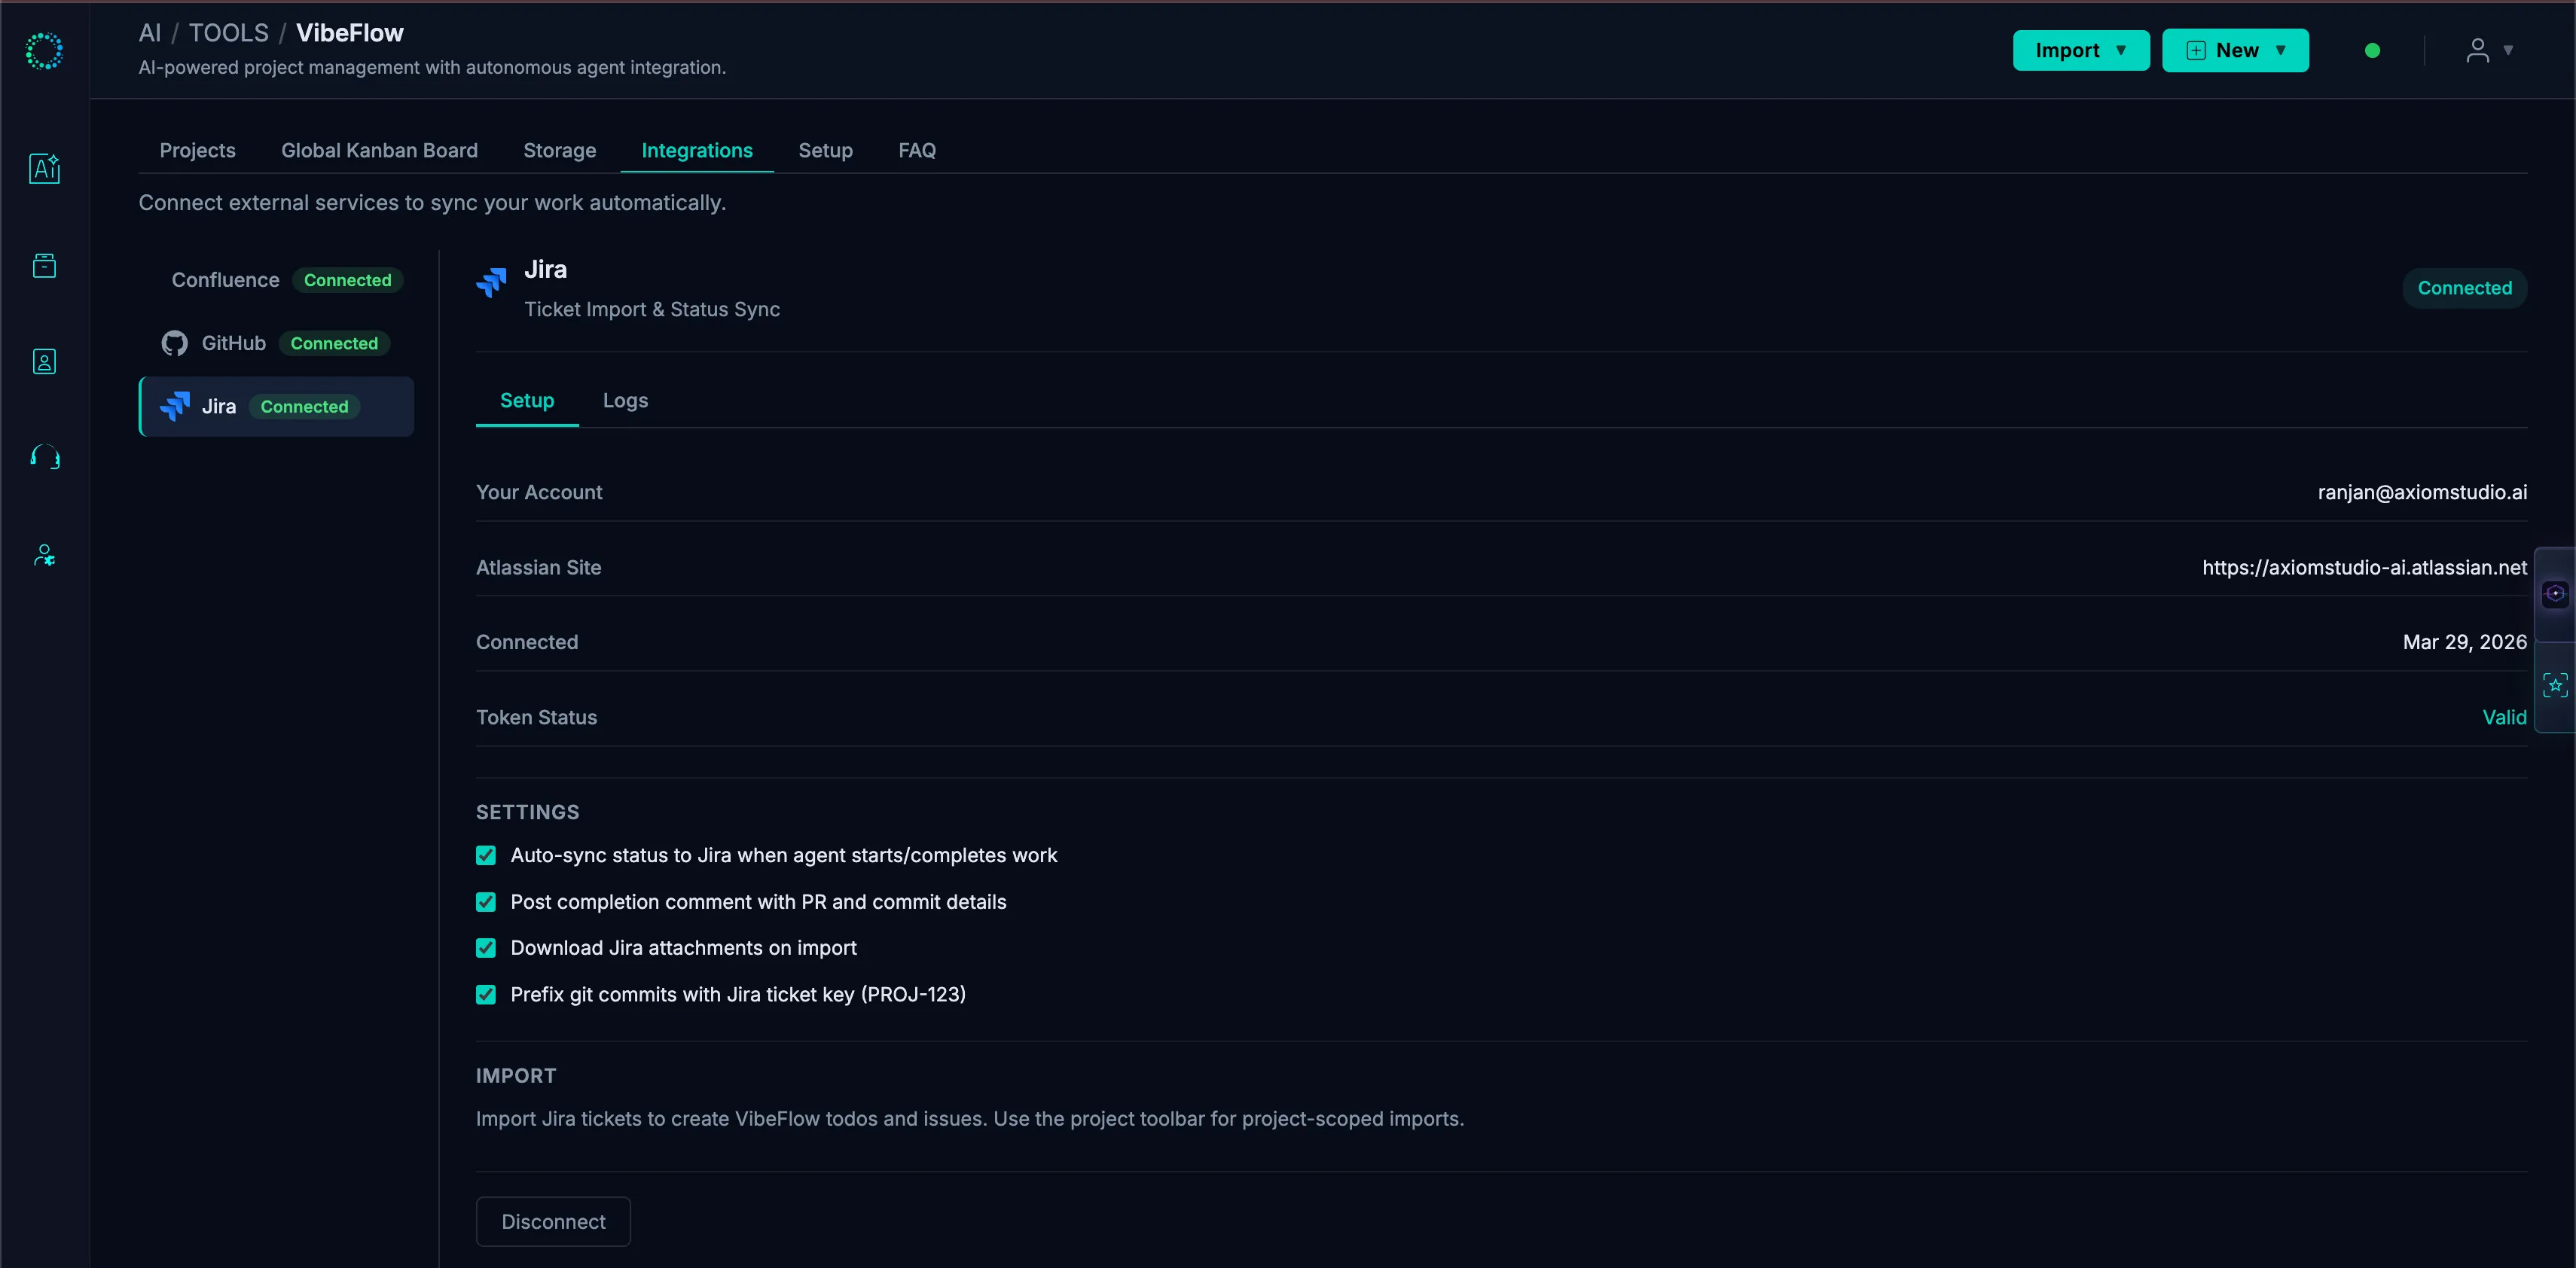
Jira Configuration
Per-organization settings available in the Jira integration tab:
- Auto-transition — Automatically sync status changes to Jira
- Completion comments — Post completion details (commit, PR, lines changed) as Jira comments
- Import attachments — Download Jira attachments on import
- Commit key prefix — Prefix git commits with Jira key (e.g.,
PROJ-123: Add login form)
Agent Prompt Integration
When working on Jira-imported items, agents automatically:
- Prefix commit messages with the Jira key
- Include
jira_syncmetadata in work item API responses
Team Connection Status
The Integrations tab shows which team members have connected their Atlassian accounts. Higher team coverage means better identity preservation in Confluence and Jira.
GitHub Integration
Connect GitHub to create pull requests automatically from agent work, sync issues, and run check runs for QA and security gates.
Connecting
- Navigate to Integrations → GitHub tab
- Click Connect GitHub
- Authorize via GitHub OAuth
- Select which repositories to link to VibeFlow projects
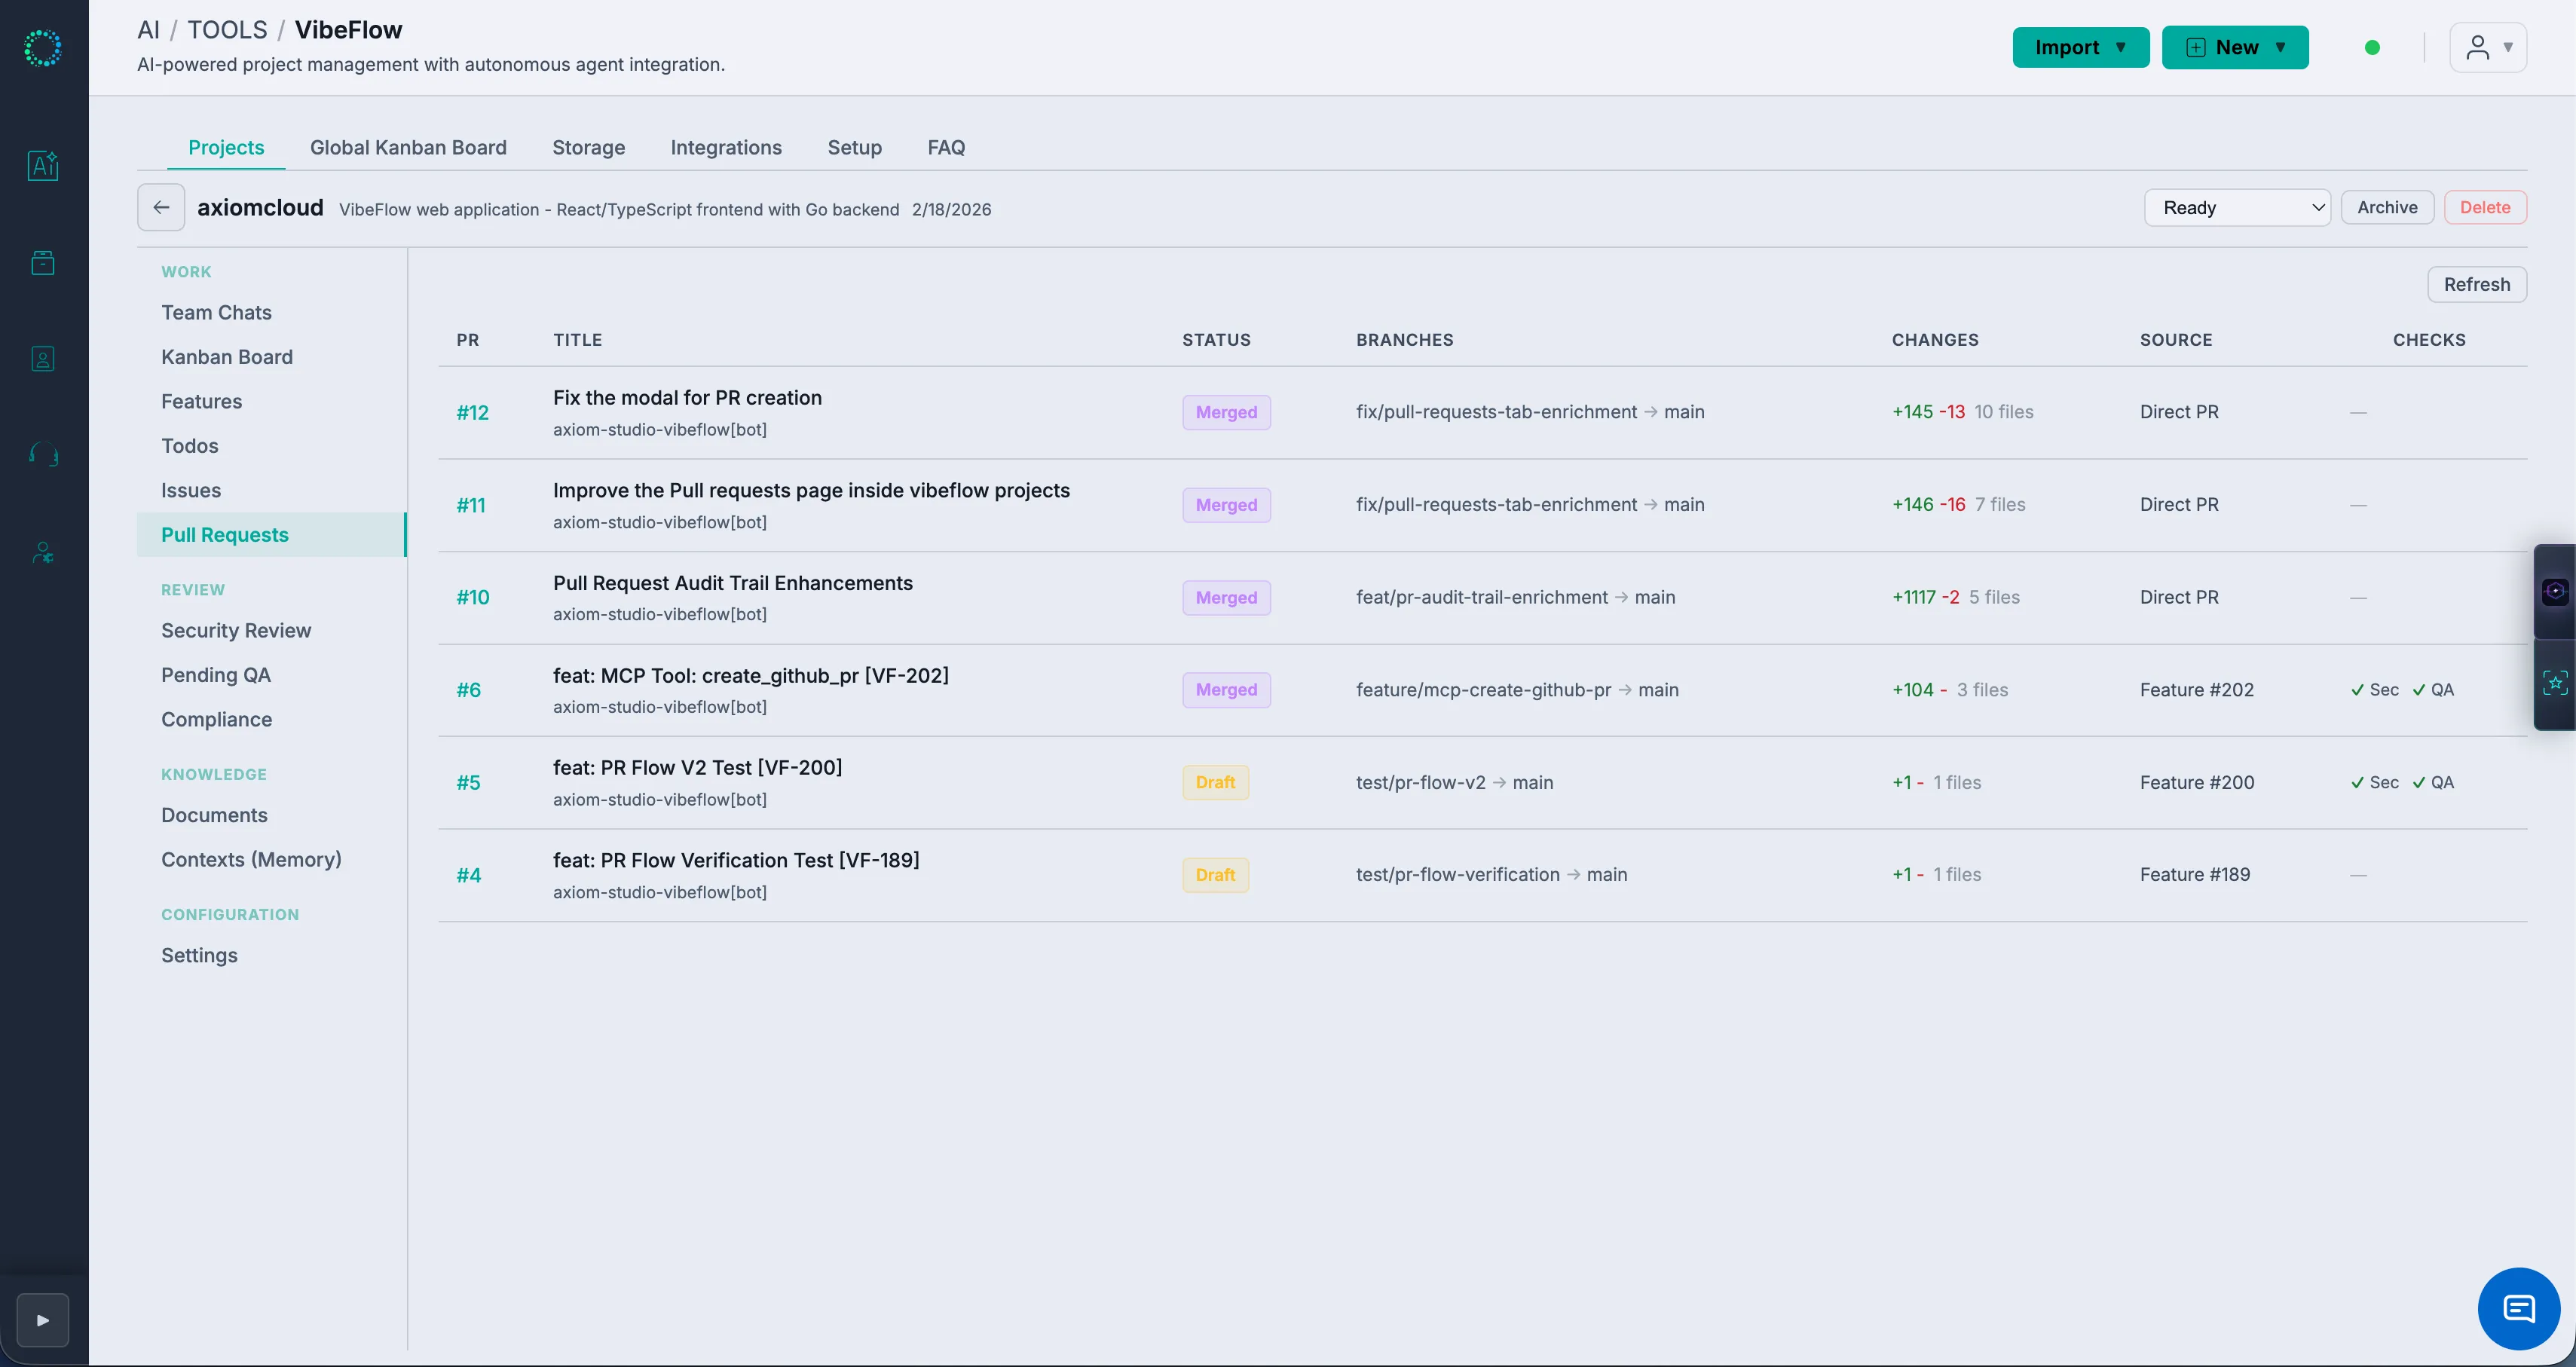
Pull Request Creation
When an agent completes work on a feature or issue, VibeFlow can automatically create a GitHub pull request:
- Auto-create PRs — Configure per-project whether PRs are created automatically on completion
- Draft PRs — PRs are created as drafts by default
- PR body — Includes execution summary, files changed, commit history, and links to VibeFlow work items
- Per-feature PRs — Features with completed todos get a consolidated PR
- Per-issue PRs — Issues can also trigger PR creation
Manual PR Creation — Source Branch Picker
When you create a PR manually from the + New → Pull Request menu, the Source Branch dropdown lists every branch in the linked GitHub repo. As of the most recent update, branches that exist locally on a connected agent's worktree but haven't been pushed to origin yet also appear in the dropdown — but rendered as a disabled option with the suffix (not pushed to origin).
This closes the gap where the Teams view showed an agent working on (e.g.) main-wt-1778773439 but the Create-PR modal silently hid that branch. Now you can see the agent's branch is real, see why you can't open a PR for it yet, and tell the agent to push before retrying.
The Destination Branch dropdown still only shows pushed-to-origin branches — you can't merge into a branch GitHub doesn't have.
📷 Screenshot needed: Create Pull Request modal showing the Source Branch dropdown with one local-only branch (e.g.
main-wt-1778773439) greyed out and the "(not pushed to origin)" suffix visible. Caption: "Create-PR modal lists local agent branches as disabled options when they haven't been pushed to origin."
Check Runs
VibeFlow registers check runs on pull requests for:
- Security Review — Shows whether the security lead has approved the changes
- QA Verification — Shows whether the QA lead has verified the implementation
Check run status updates in real-time as reviews complete in VibeFlow.
Issue Sync
Link GitHub issues to VibeFlow work items for bidirectional status tracking:
- Import GitHub issues into VibeFlow
- Status changes in VibeFlow update the linked GitHub issue
Configuration
Per-project GitHub settings:
- Repository — Which GitHub repo is linked
- Auto-create PRs — Enable/disable automatic PR creation
- Draft PRs — Create PRs as draft by default
- Base branch — Default target branch for PRs
Vendor Logs
The GitHub Logs sub-tab shows all API interactions: PR creation, check run updates, issue syncs, and any errors with timestamps and details.
Slack Notifications
Send real-time project notifications to Slack channels when important events happen in your VibeFlow projects.
Setting Up Slack Webhooks
- Navigate to the Integrations tab in the top-level sidebar
- Click the Slack panel
- Add a new webhook:
- Name — Descriptive label (e.g., "engineering-alerts")
- Webhook URL — Your Slack Incoming Webhook URL
- Click Save — VibeFlow sends a test message to verify the webhook
Webhooks are org-level — one webhook can receive notifications from multiple projects.
Linking Projects to Webhooks
Each project can be linked to one or more Slack webhooks:
- Open a project → Settings tab → Notifications
- Check the webhooks that should receive notifications for this project
- Toggle individual event types on or off
Notification Events
Events are grouped by category:
| Category | Events |
|---|---|
| Projects | Project created, archived, deleted |
| Features | Feature created, archived, deleted |
| Todos | Todo created, completed, rejected |
| Issues | Issue created, completed, rejected |
Each event type can be independently enabled or disabled per project.
Notification Format
Notifications are sent as Slack Block Kit messages with:
- Header — Event type label
- Body — Entity name with key details
- Deep link — "Open in VibeFlow" link to jump directly to the relevant item
Health Monitoring
VibeFlow monitors webhook health automatically:
- If a webhook fails to deliver, it enters degraded state
- Degraded webhooks are retried periodically by a leader-elected health checker
- Webhooks that recover are automatically marked healthy
- The Slack panel shows current health status for each webhook
ClickUp Integration
VibeFlow's ClickUp integration supports both ClickUp-primary and VibeFlow-primary workflows. You can import existing ClickUp tasks into VibeFlow for agent implementation, or push VibeFlow features, todos, issues, documents, comments, attachments, tags, and status changes back to ClickUp.
This integration is gated behind the feature_clickup feature flag and must be enabled per organization.
Note: ClickUp integration is currently in limited rollout. Contact your admin to enable the
feature_clickupflag for your organization.
Connecting
- Navigate to Settings or Integrations and open the ClickUp panel
- Click Connect ClickUp
- Authorize the ClickUp OAuth app
- Select the workspace VibeFlow should use for browsing, imports, and sync
- Configure a project push target in Project Settings -> Integrations -> ClickUp
Each team member can connect their own ClickUp account. For background sync jobs, VibeFlow first tries the acting user's token and can fall back to another connected user in the organization when needed.
ClickUp Task Import
The ClickUp Import Wizard is a 4-step process:
-
Select Tasks — Browse the ClickUp hierarchy or search by keyword
- Browse by workspace -> space -> folder -> list -> tasks
- Folderless lists appear beside folders
- Search can run within the current list or across the connected workspace
- Already-imported tasks are marked unavailable so they are not linked twice
-
Select Mapping — Choose how imported tasks become VibeFlow work
- Import as todo when the work belongs to a feature
- Import as issue for standalone or featureless work
- Choose an existing feature, create a new feature, or leave an issue featureless
- New feature names can be suggested from the ClickUp folder/list path
-
Select Branch — Choose the target git branch and repository for the imported work
- Imported todos and issues get the selected
target_branch - Agents polling that branch can claim the work
- If no branch is selected, the project default branch is used
- Imported todos and issues get the selected
-
Import — VibeFlow fetches each selected ClickUp task and creates the VibeFlow item
- Task name becomes the todo/issue title
- Task description becomes the VibeFlow description
- ClickUp priority is mapped to VibeFlow priority
- ClickUp status is mapped through the configured status mapping
- ClickUp tags are imported into VibeFlow tags
- A ClickUp link record is created with
push_direction: importedandsync_status: linked
ClickUp task imports are idempotent by task link: if a ClickUp task is already linked to a VibeFlow item, the import is rejected instead of creating a duplicate.
VibeFlow to ClickUp Push
VibeFlow can also push local work into ClickUp:
- Single work item push — Push a todo or issue into the configured ClickUp list
- Feature push — Push a VibeFlow feature as a ClickUp folder and enqueue its todos as ClickUp tasks
- Auto-push — When ClickUp is enabled and a default target is configured, newly-created items can be enqueued for ClickUp creation
- Field sync — Title, description, priority, tags, and configured custom fields can update the linked ClickUp task
- Comment sync — VibeFlow comments can be posted to the linked ClickUp task
Push operations use an asynchronous write-ahead log (WAL). The UI returns quickly with an enqueued status, then the ClickUp worker creates or updates the external task. The worker records failed operations, retries recoverable failures, and uses idempotent link/folder handling to avoid duplicate ClickUp tasks or folders after partial failures.
ClickUp Status Sync
Status changes in VibeFlow can sync to ClickUp:
| VibeFlow Event | ClickUp Action |
|---|---|
| Imported ClickUp task | Create todo or issue with mapped VibeFlow status |
| Todo or issue status changes | Update linked ClickUp task status using the export mapping |
| Title, description, or priority changes | Update linked ClickUp task fields |
| Tags change | Update linked ClickUp task tags |
| Execution/activity comment published | Post a comment to the linked ClickUp task |
Status mapping is configured per ClickUp list. The mapping supports:
- Multiple VibeFlow statuses mapped to one ClickUp status
- One import target for each ClickUp status
- Export-only mappings for additional VibeFlow statuses
donequalifiers for QA and Security review states, so "done but not QA verified" can map differently from fully verified work
Default mappings are provided for common ClickUp statuses such as backlog, scoping, in development, testing, shipped, and cancelled, but real ClickUp list statuses are loaded from the ClickUp API so each project can match its workspace configuration.
ClickUp Sync Badge
Linked todos and issues display ClickUp metadata on the detail view:
- ClickUp Sync Badge — Clickable badge linking to the ClickUp task
- ClickUp Detail Section — Collapsible panel showing task ID, ClickUp status, push direction, and sync status
- Direction — Shows whether the item was
importedfrom ClickUp orpushedfrom VibeFlow - Sync Status —
linked,syncing,completed,failed, ordead_letter
Failed and dead-lettered syncs show the error message so admins can diagnose and retry.
ClickUp Configuration
Project settings expose ClickUp controls:
- ClickUp Documents Sync — Project-owner toggle that automatically pushes VibeFlow documents to ClickUp Docs when created or updated
- ClickUp Push Target — Default ClickUp space and list where pushed work items are created
- ClickUp Status Mapping — Per-list mapping from ClickUp statuses to VibeFlow statuses, including QA/Security qualifiers for
done
Organization-level configuration also controls whether ClickUp is enabled, whether auto-transition and completion comments are enabled, whether attachments are imported, whether auto-push is enabled, and whether attachments should be pushed.
ClickUp Docs
ClickUp Docs can move in both directions:
- Import ClickUp Docs — Imported ClickUp Docs become live, read-only references. Content is fetched from ClickUp on demand, matching Confluence reference behavior.
- Push VibeFlow Documents — VibeFlow documents can be pushed to ClickUp Docs. If a linked ClickUp Doc already exists, edits update that doc instead of creating a duplicate.
- Auto document sync — When enabled for a project, new or updated VibeFlow documents are pushed to ClickUp automatically.
When pushing a document, VibeFlow prefers the ClickUp space associated with the project's linked feature folders, then falls back to the configured default space.
Comments and Attachments
For linked ClickUp tasks:
- ClickUp comments can be imported for deduplication tracking
- VibeFlow comments can be pushed to ClickUp
- ClickUp attachments can be imported into VibeFlow assets when attachment import is enabled
- Attachment and comment operations are logged in the integration vendor logs
Sync Health and Logs
The ClickUp integration exposes health and recovery controls:
- Health status — Reports linked item count, pending syncs, failed syncs, recent dead letters, last poll time, and webhook status
- Retry failed syncs — Requeues dead-lettered WAL entries for another attempt
- Synced links — Lists ClickUp task links for a project
- Vendor logs — Records import, search, docs, comments, attachments, push, and sync operations with success/failure status and request context
ClickUp also supports webhook and polling paths. Webhooks provide near-real-time updates where configured, while polling acts as a fallback for sync health and recovery.
Figma Integration
Connect your Figma account to pull design context directly from Figma files:
- Go to Settings → enter your Figma Personal Access Token
- Browse Figma files from within VibeFlow
- Pull design context and screenshots for agent reference
Supported AI Agent Platforms
VibeFlow connects with multiple AI coding platforms via MCP (Model Context Protocol):
| Platform | Setup Location |
|---|---|
| Claude Code CLI | Project → Setup tab |
| Claude Desktop | Project → Setup tab |
| Cursor | Project → Setup tab |
| Gemini | Project → Setup tab |
| OpenAI Codex | Project → Setup tab |
Each platform has specific configuration instructions in the Setup tab.
Integration Logs
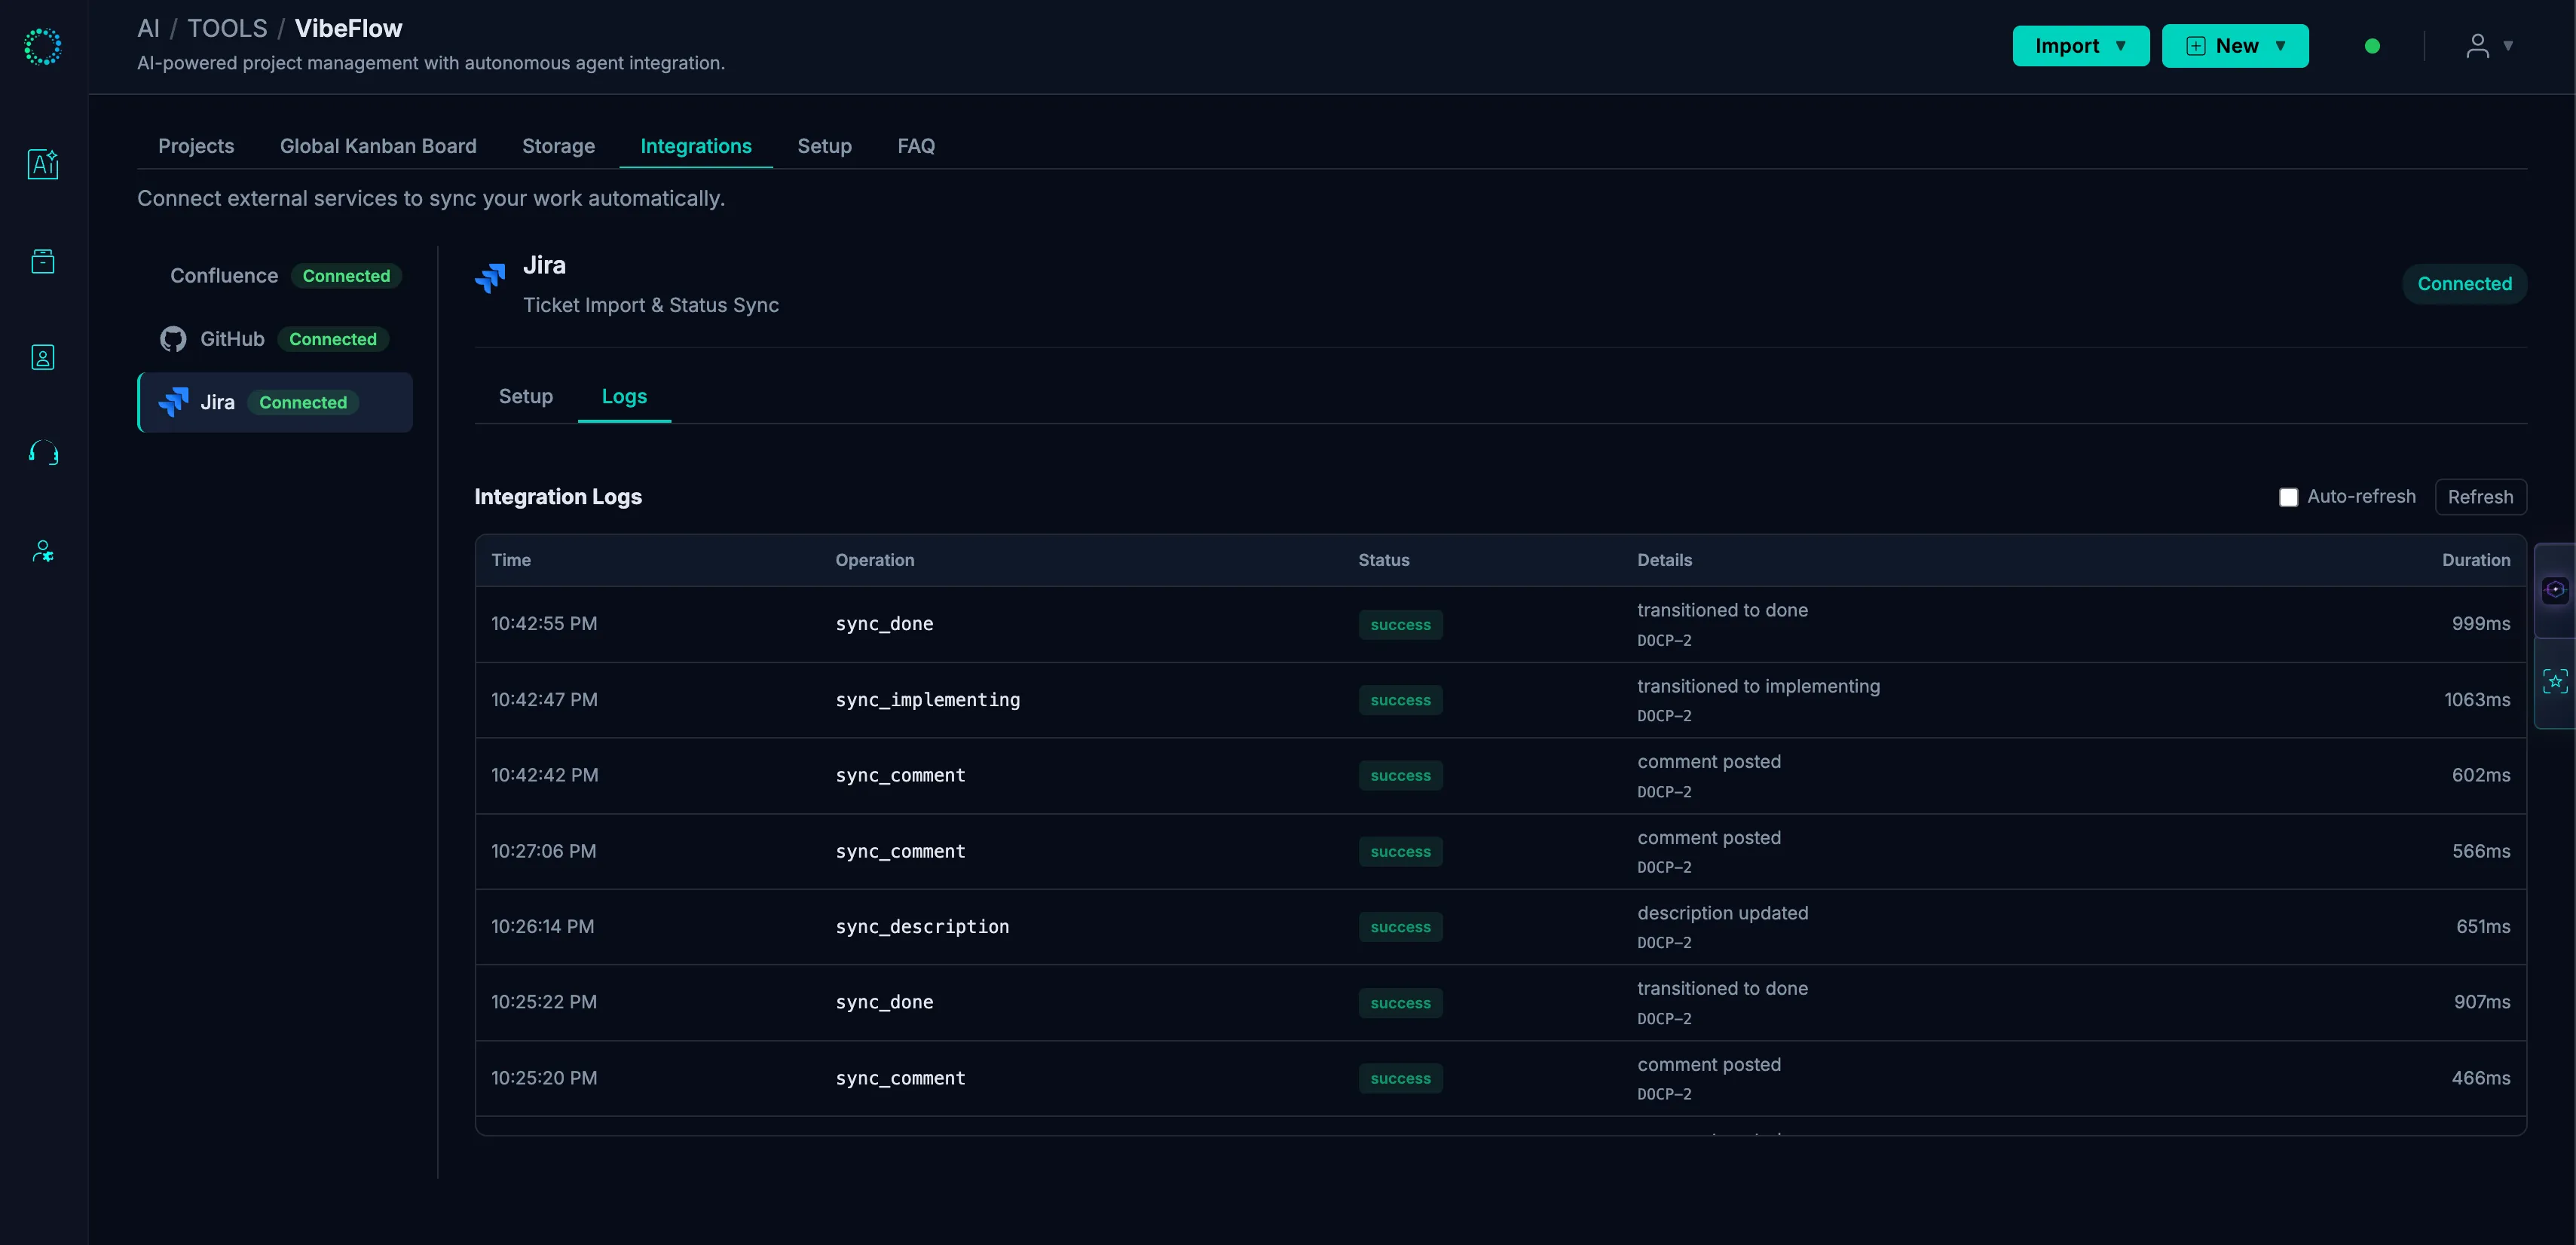
Every integration vendor has a dedicated Logs tab showing:
- Success/failure status of each API call
- Error codes and messages
- Request context and timestamps
- OAuth token refresh events
Logs help diagnose sync issues without contacting support.